
How to Configure Alibaba SMC for Server Migration
A step-by-step guide to migrate your servers to Alibaba Cloud using SMC
ALIBABA CLOUD
Abhishek Gupta
7/28/20246 min read

Alibaba SMC (Server Migration Center) is a service that helps you migrate your physical or virtual servers to Alibaba Cloud. SMC supports various source platforms, such as VMware, Hyper-V, KVM, Xen, and physical machines. SMC also supports incremental data replication, which minimizes the downtime and data loss during migration.
In this blog, I will show you how to configure Alibaba SMC for server migration. You will learn how to:
Create a migration project and a migration source in SMC
Install the SMC agent on the source server
Create a migration task and start the migration
Verify the migration result and launch the target instance
Prerequisites
Before you start, you need to have the following:
An Alibaba Cloud account. You can sign up for a free account here.
An AccessKey pair (AccessKey ID and AccessKey secret) for your Alibaba Cloud account. You can create one in the User Center.
A source server that you want to migrate. It can be a physical or virtual server running Windows or Linux. Make sure the server meets the requirements for SMC.
A target region and zone in Alibaba Cloud where you want to migrate the server. You can check the available regions and zones here.
A target instance type and disk configuration for the migrated server. You can check the instance families and disk categories here.
A VPC and a VSwitch in the target region and zone. You can create them in the VPC console.
A security group in the target region and zone. You can create one in the ECS console.
Step 1: Create a migration project and a migration source in SMC
A migration project is a logical container that groups the migration tasks for a specific purpose. A migration source is a source platform that hosts the servers to be migrated. You need to create a migration project and a migration source in SMC before you can create migration tasks.
To create a migration project and a migration source, follow these steps:
Log in to the SMC console with your Alibaba Cloud account.
In the left-side navigation pane, choose Migration Projects.
On the Migration Projects page, click Create Project.
In the Create Project dialog box, enter a name and a description for the project, and click OK.
On the Migration Projects page, find the project that you created, and click Add Source in the Actions column.
In the Add Source dialog box, enter the following information and click OK:
Source Type: Select the type of your source platform, such as VMware, Hyper-V, KVM, Xen, or Physical Machine.
Source Name: Enter a name for the source platform.
AccessKey ID: Enter the AccessKey ID of your Alibaba Cloud account.
AccessKey Secret: Enter the AccessKey secret of your Alibaba Cloud account.
Region: Select the region where the SMC service is located. It is recommended to select the same region as the target region for migration.
After you add the source, you can see it on the Migration Sources tab of the project.
Step 2: Install the SMC agent on the source server
The SMC agent is a software that collects the information and data of the source server and transfers them to SMC. You need to install the SMC agent on the source server before you can create a migration task.
To install the SMC agent on the source server, follow these steps:
On the Migration Sources tab of the project, find the source that you added, and click Download Agent in the Actions column.
On the Download Agent page, select the operating system of the source server, and click the download link to download the agent installation package.
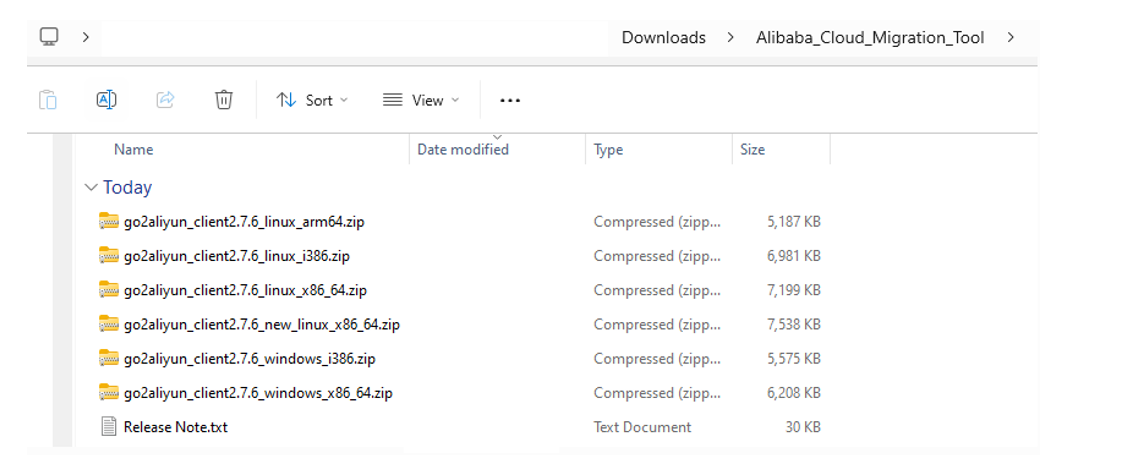
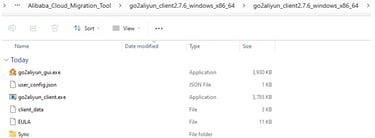
Copy the agent installation package to the source server, and run the installation program. (Windows)
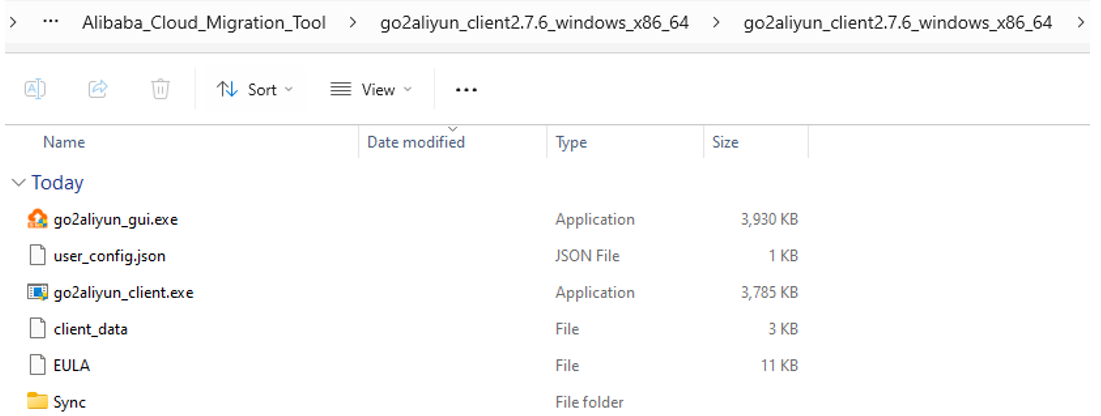
Copy the agent installation package to the source server, and run the installation program. (Linux)


Follow the instructions to complete the installation. You need to enter the AccessKey ID, AccessKey secret, and region of the source that you created in SMC.


After the installation, you can see the agent status on the Agent Management tab of the source.

Step 3: Create a migration task and start the migration
A migration task is a specific operation that migrates a source server to a target instance in Alibaba Cloud. You need to create a migration task for each server that you want to migrate.
To create a migration task and start the migration, follow these steps:
On the Migration Sources tab of the project, find the source that you added, and click Create Task in the Actions column.
On the Create Task page, select the source server that you want to migrate, and click Next.
On the Configure Task page, enter the following information and click Next:
Task Name: Enter a name for the migration task.
Target Region: Select the region where you want to migrate the server.
Target Zone: Select the zone where you want to migrate the server.
Instance Type: Select the instance type for the migrated server.


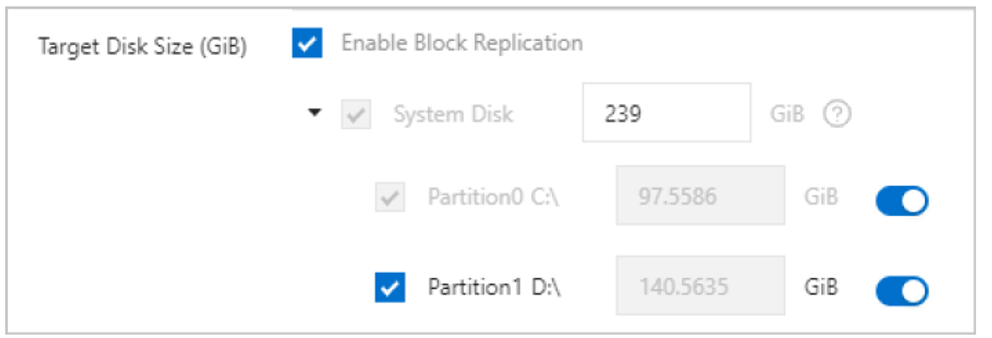
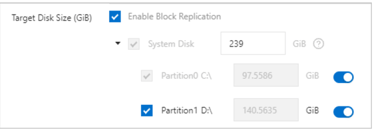
System Disk: Configure the system disk for the migrated server. You can select the disk category, size, and encryption option.
Data Disk: Configure the data disks for the migrated server. You can add, delete, or modify the data disks. You can also select the disk category, size, and encryption option for each data disk.
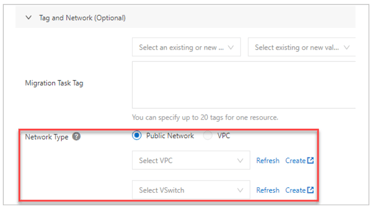
Network Type: Select the network type for the migrated server. You can choose VPC or Classic network.
VPC: If you select VPC as the network type, you need to select the VPC and the VSwitch for the migrated server.

Security Group: Select the security group for the migrated server.
Advanced: You can configure some advanced options, such as hostname, RAM role, instance charge type, and auto-start instance.
On the Confirm Task page, review the task information, and click Create.
On the Migration Tasks tab of the project, find the task that you created, and click Start in the Actions column.
On the Start Task dialog box, select the migration mode and the speed limit, and click OK.
The migration task will start and you can monitor the progress on the Migration Tasks tab.
Step 4: Verify the migration result and launch the target instance
After the migration task is completed, you need to verify the migration result and launch the target instance in Alibaba Cloud.
To verify the migration result and launch the target instance, follow these steps:
On the Migration Tasks tab of the project, find the task that you completed, and click View Details in the Actions column.


On the Task Details page, check the task status and the migration result. If the task status is Successful, it means the migration is successful. If the task status is Failed, it means the migration failed. You can check the error message and the troubleshooting guide to fix the issue.


After the instance is started, you can log in to the instance and check the system and data disks.
You can also perform some post-migration operations, such as changing the IP address, modifying the security group rules, or installing the Alibaba Cloud CLI.

If the migration is successful, you can go to the ECS console to view the target instance.
In the ECS console, find the target instance, and click Start in the Actions column.
In this blog, I showed you how to configure Alibaba SMC for server migration. You learned how to create a migration project and a migration source, install the SMC agent, create and start a migration task, and verify and launch the target instance. I hope this blog helps you migrate your servers to Alibaba Cloud with ease and efficiency.
If you have any questions or feedback, please feel free to leave a comment below. You can also visit the SMC documentation for more information and guidance.